
We LOVE visuals schedules, both as a therapy tool and as a tool to use at home. Visual schedules can help children by providing structure, so they know exactly what to expect next. It can also help with transitions to and from speech therapy, and with transitions between activities.
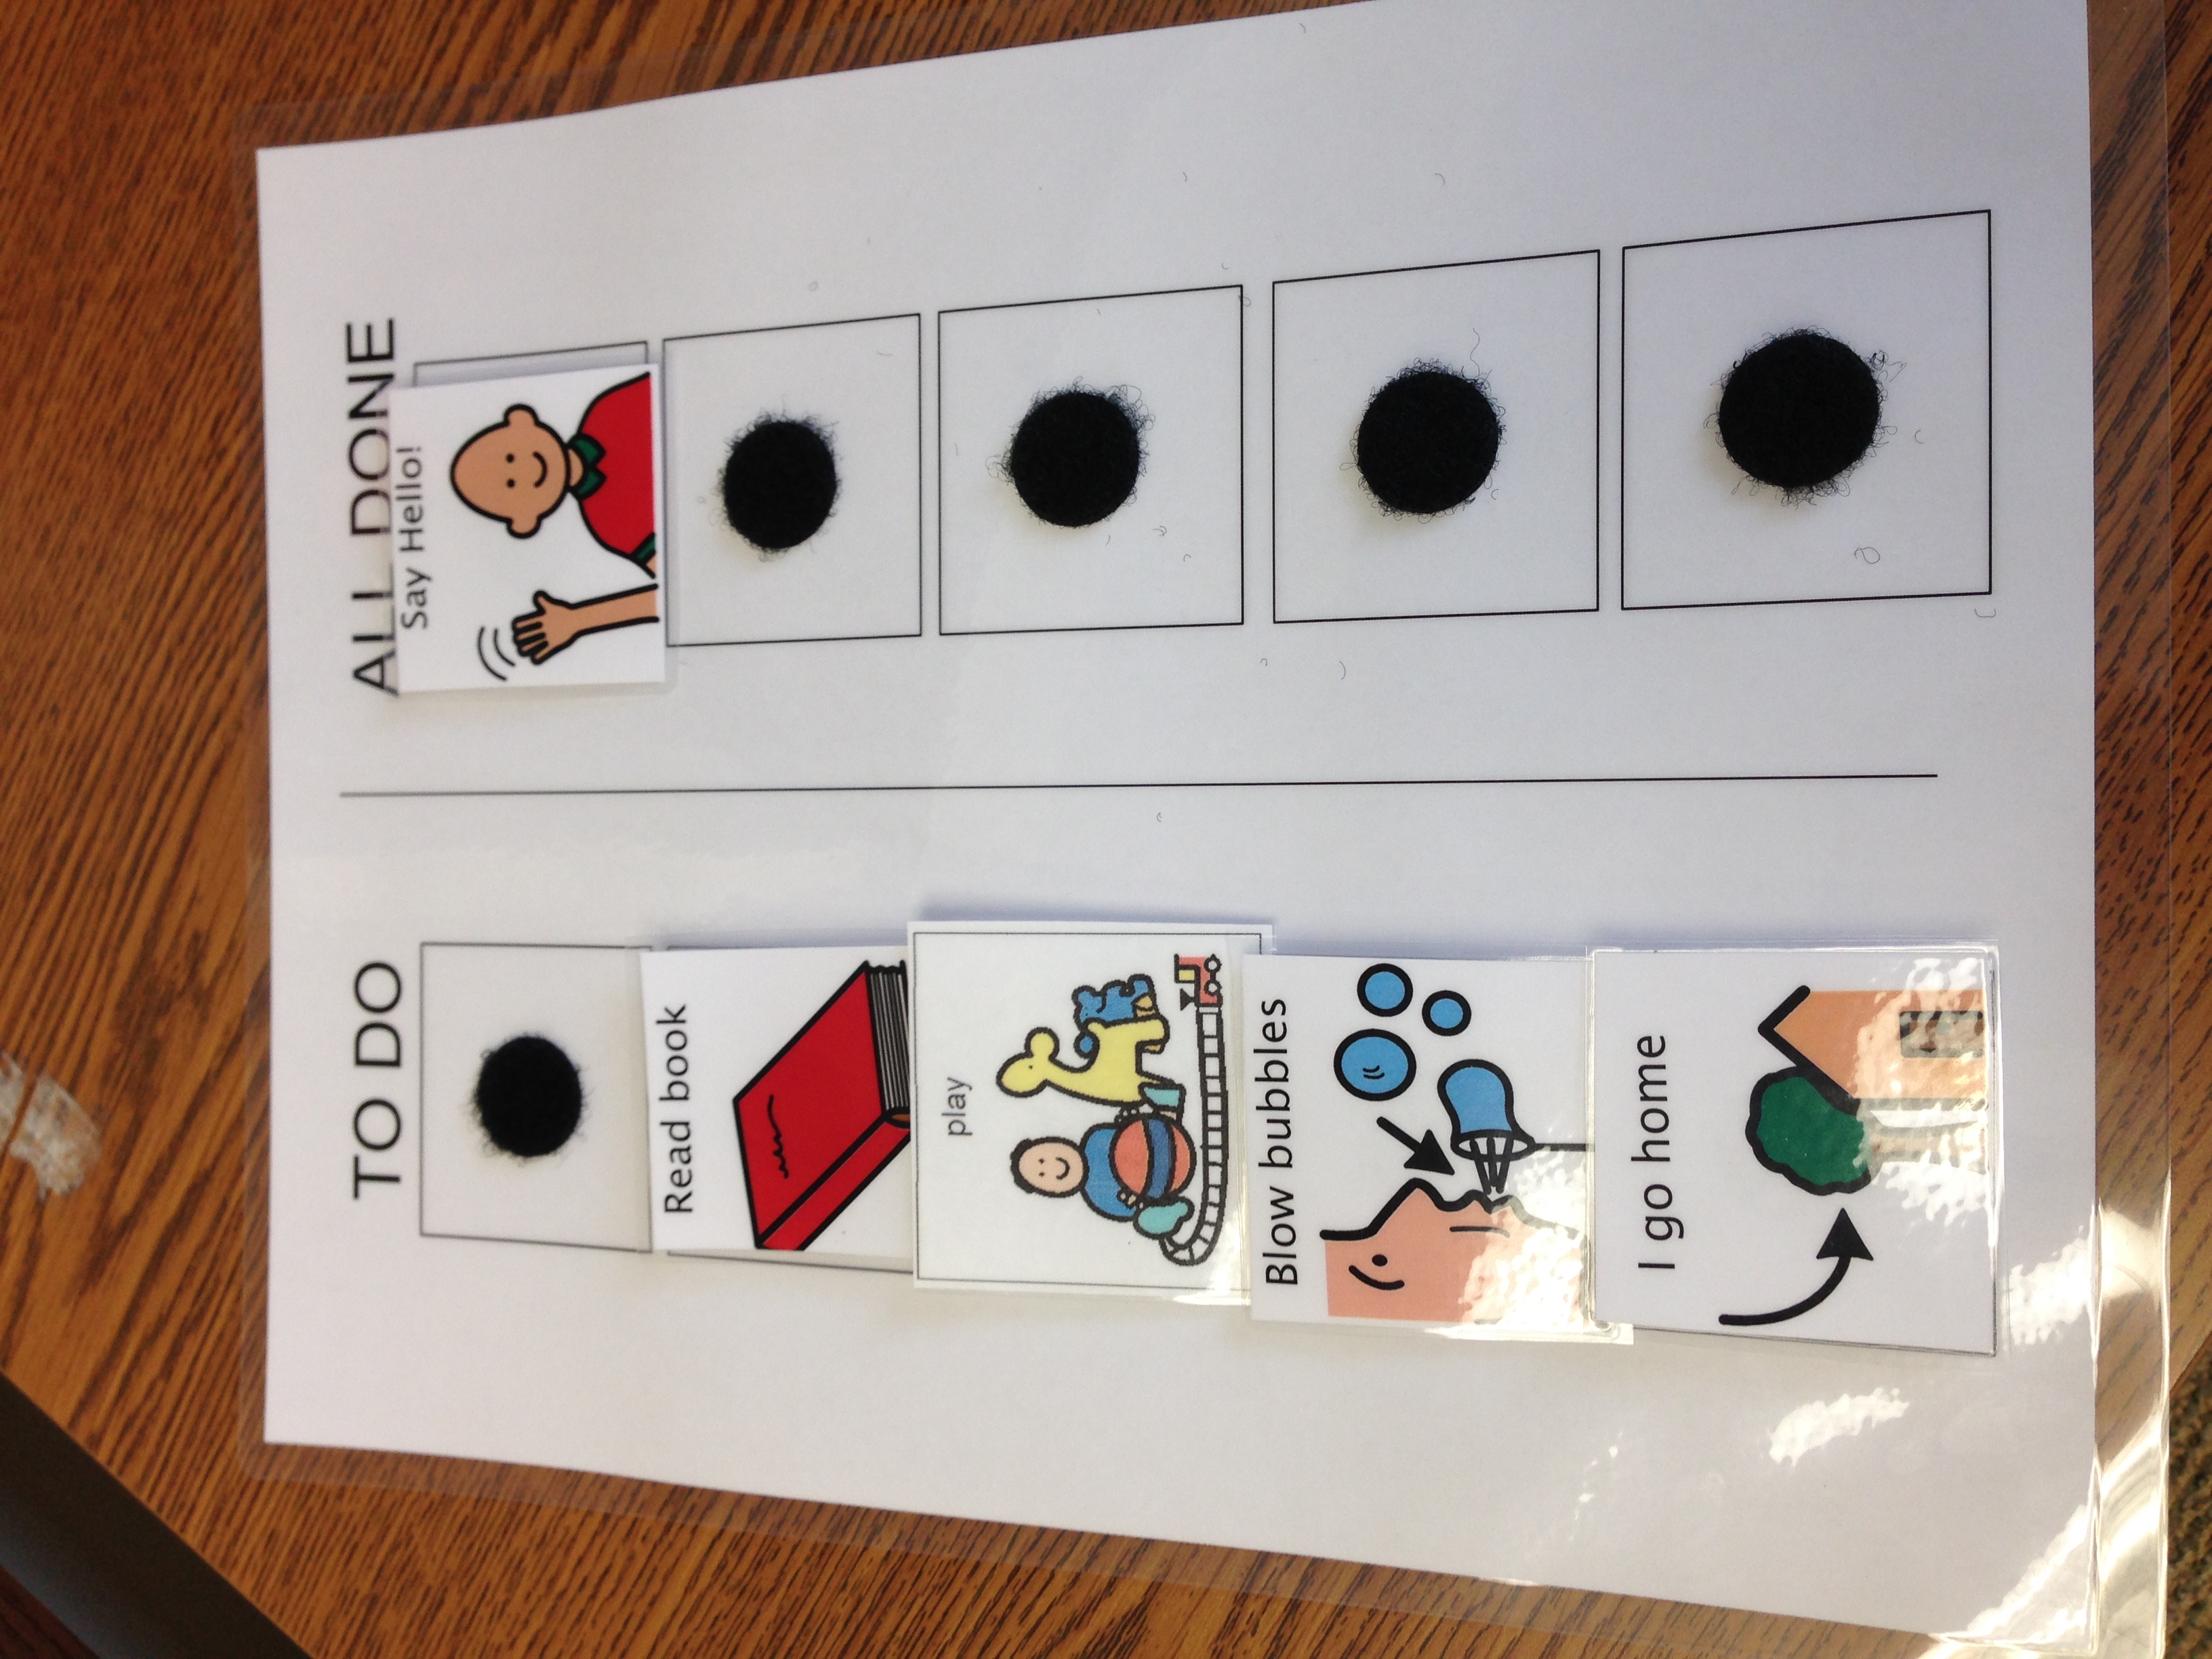
The complexity of a visual schedule can vary based on the child's needs and ability level. For older kids (i.e. ages 4 and up, who also are able to handle this level of complexity), we sometimes use a "to do" list with an "all done" column you can transfer items to when they are completed.

For younger kids we like to use a "first... then" format. We might go through this process several times within a session, but it lets kids know exactly what to expect.
The great thing about visual schedules is that you can make cards for any item. We like to use the software program Boardmaker for this, but if you don't have access you can use Microsoft office, create a table, and then fill in each cell of the table with a picture (Google images is great for this, or clip art - just something a child will easily recognize) and then label the picture so you and any other adult can quickly and easily know exactly what it is. We then laminate a base page and then laminate and cut out a variety of symbols. These can be made for any and all activities or objects. We like to use velcro dots to make it easy to take items and off. When a child is done with an item, either than can move it to an "all done" column, or take the symbol off and put it in an "all done" box.
Sometimes we make versions of these for our clients to use at home, too! You can use a transition board like these all day if that's what a child needs. Working on transitions can be tricky for any number of kids, whether it's due to inflexibility, anxiety, or attention challenges, and a visual schedule can be the perfect solution for many kids!